What is SharePoint?
Organizations use Microsoft SharePoint to create websites. You can use it as a secure place to store, organize, share, and access information from any device. All you need is a web browser, such as Microsoft Edge, Internet Explorer, Chrome, or Firefox. Want to learn more? Get started with SharePoint.
Take a look at the latest version of SharePoint. When you create a new team site, this is what you’ll see for SharePoint and SharePoint Server 2019
OVERVIEW
With Microsoft SharePoint on your PC, Mac, or mobile device, you can:
-
Build intranet sites and create pages, document libraries, and lists.
-
Add web parts to customize your content.
-
Show important visuals, news, and updates with a team or communication site.
-
Discover, follow, and search for sites, files, and people across your company.
-
Manage your daily routine with workflows, forms, and lists.
-
Sync and store your files in the cloud so anyone can securely work with you.
-
Catch up on news on-the-go with the mobile app.
Sync the files in your Microsoft 365 or Microsoft SharePoint site libraries so they’re always available on your computer, even when you’re offline.
Turn on Files On-Demand in OneDrive
-
In the Windows notification area, select the blue OneDrive cloud icon.

Note: If you’re on Windows 10, your computer already has the OneDrive desktop app on it, but you’ll need to turn on Files On-Demand in OneDrive settings.
-
Select
 Help & Settings > Settings.
 -
Select Settings > Save space and download files as you use them.
Set up Sync for your library
-
In your browser, on your SharePoint site, navigate to the library of files you want to sync with.
-
Select Sync in the toolbar.

Note: If your browser asks for permission to use OneDrive, confirm that it’s OK.
-
Sign in to OneDrive to start syncing your files and finish OneDrive setup.
Work with your files in your file system
-
Once synced, your SharePoint files appear in File Explorer under the name of your organization (or in Mac Finder, if you’re using a Mac).
-
Each location will appear in a separate subfolder.
-
Copy or move files from your computer to SharePoint right from your file system.
-
To check the status of your files, add an account, or manage other sync settings, select the blue OneDrive cloud icon in the Windows notification area.
Work with files in Files On-Demand
After Files On-Demand is turned on, you’ll see new status icons next to each of your SharePoint files. You can copy or move files from your computer to SharePoint right from your file system.
 |
Save space on your device by making files online-only. These files are only available when you’re connected to the Internet, but don’t take up space on your computer. |
 |
When you open an online-only file, it downloads to your device and becomes locally available. You can open a locally available file at anytime even without Internet access. |
 |
To make a file always available, even when you’re offline:
To change a file back to an online-only file:
|
Try it!
In a Microsoft SharePoint document library, create a new file, upload your own, and then share it with others.
Create a file
-
To create a new file, select New and the file type you want.
-
When the new file opens in your browser, add text, images, and more to your file and it’ll automatically be saved to the document library.
-
Select down arrow next to the file name to rename the file or select the site name to see the new file in your document library.
Upload a file
From your computer, select the file you want and drag it into the document library.
Share a file
-
Select the file you want to share so a green checkmark
 appears.
 -
Select Share.
-
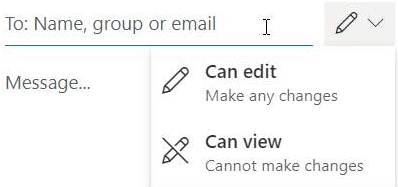
Select an option to share your file:
-
Add the names of people you wish to share your file with. If you want, quickly adjust the editing permissions by selecting the pencil icon on the right. Then type a message and select Send.
-
Copy Link creates a direct link to the file that you can share in an email or IM.
-